 Save
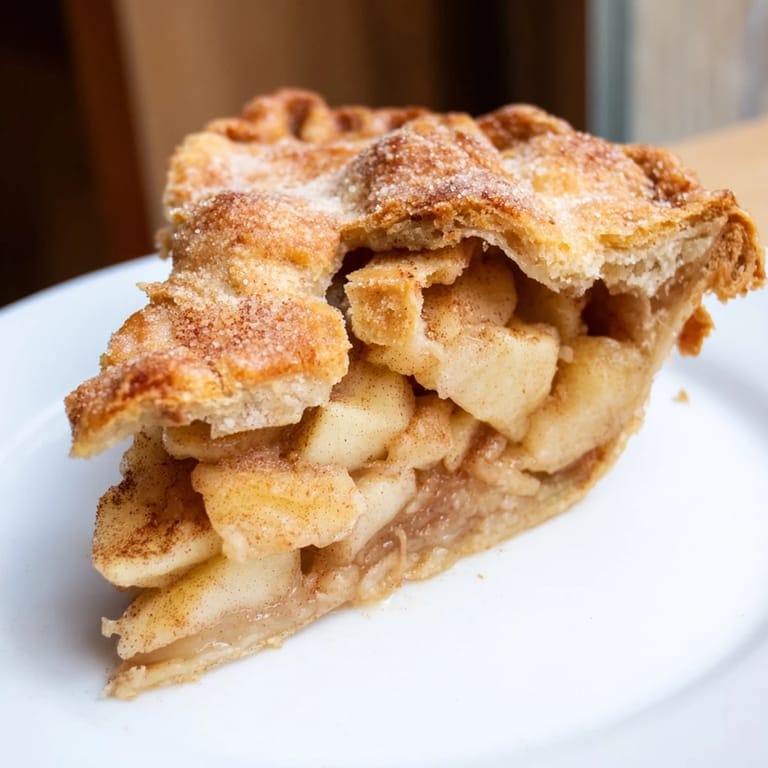
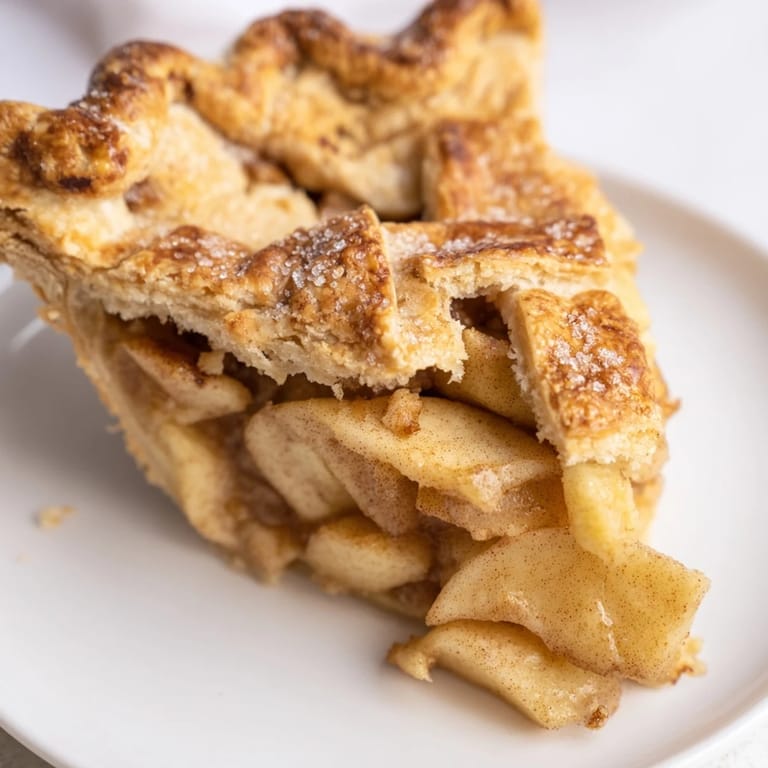
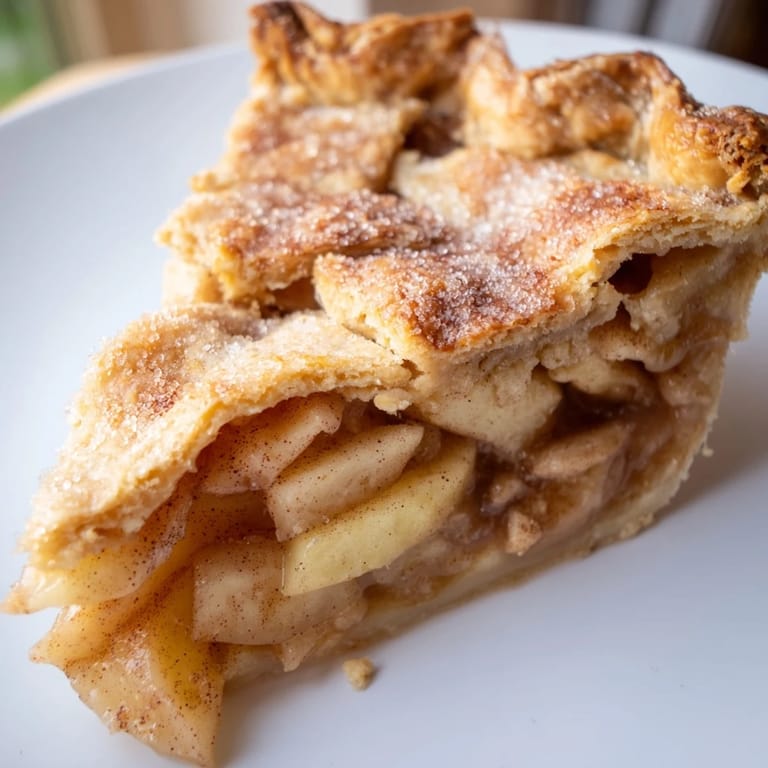
Save There's something about the smell of cinnamon and butter hitting the kitchen that makes everything feel like it's exactly where it should be. My grandmother's apple pie taught me that baking isn't really about precision—it's about knowing when to trust your hands and when to listen to what the dough needs. The first time I made it without her watching, I was terrified the crust would fall apart, but it didn't. Instead, it became this beautiful golden blanket over a filling that bubbled at the edges like it was alive. Now every autumn, when I pull this out of the oven, I'm that person again—uncertain but somehow certain.
I made this for a dinner party once where someone mentioned they'd never had homemade pie before, and I watched their face when they took that first bite. The filling was tender but not mushy, the crust had that impossible flakiness that store-bought can never capture, and suddenly I understood why my grandmother treated pie-making like an art form. That pie became the reason they bought a rolling pin the very next week.
Ingredients
- All-purpose flour (2 1/2 cups): This is the foundation of your crust—you want it cold and handled as little as possible, because overworking it turns butter into a mess instead of keeping those precious little pockets that make it flaky.
- Unsalted butter, cold and cubed (1 cup): Cold is non-negotiable here; warm butter will sabotage your entire crust, so pull it straight from the fridge and work quickly.
- Ice water (6–8 tbsp): Start with less and add gradually—wet dough forgives you, but dry dough that's already mixed won't come back together.
- Salt and sugar for crust (1 tsp salt, 1 tbsp sugar): These aren't optional flavor additions; they're structural elements that enhance the buttery taste and help the dough brown.
- Medium apples, mixed varieties (6–7): Granny Smith and Honeycrisp together give you tartness and sweetness—use just one type and your filling becomes one-dimensional.
- Cinnamon and nutmeg (1 1/2 tsp and 1/4 tsp): These spices wake up the apples without overwhelming them; freshly ground if you have it makes a noticeable difference.
- Lemon juice (1 tbsp): This is your secret weapon for keeping the filling from tasting flat and muddled.
- Both sugars (3/4 cup granulated, 1/4 cup brown): The brown sugar adds depth that granulated alone can't deliver.
- Egg wash (1 egg beaten with 1 tbsp milk): This is what gives you that glossy, golden-brown top that tells everyone you know what you're doing.
Tired of Takeout? 🥡
Get 10 meals you can make faster than delivery arrives. Seriously.
One email. No spam. Unsubscribe anytime.
Instructions
- Build your crust:
- Whisk flour, salt, and sugar together, then work in cold butter pieces until everything looks like coarse breadcrumbs with some pea-sized chunks remaining. Add ice water slowly, stirring just until the dough barely comes together—it should look shaggy and reluctant, not smooth and cooperative.
- Rest the dough:
- Flatten each half into a disk, wrap them, and let them sit in the fridge for at least an hour; this gives the gluten time to relax and the butter time to firm up, which means less shrinking when it bakes.
- Prepare your apples:
- Peel, core, and slice them into quarter-inch pieces, then toss with both sugars, spices, flour, and lemon juice; the flour acts like a thickener and prevents a soggy bottom crust.
- Assemble and fill:
- Roll out the first disk on a floured surface and fit it into your pie dish, then add the apple mixture mounding slightly in the center, dot with butter, and roll out the second disk to lay on top. Seal the edges by pressing them together, then crimp them with a fork or your fingers for that rustic look that actually serves a purpose—it keeps everything sealed.
- Finish and bake:
- Brush the top with egg wash, sprinkle with coarse sugar if you want that crunch, cut a few slits for steam, and bake at 400°F on the lower rack for 45–55 minutes until the crust is deep golden and you can see filling bubbling at the edges. If the edges start browning too fast, tent them with foil.
- Cool before slicing:
- This is the hardest part—let it rest on a rack for at least two hours so the filling sets properly and won't run all over your plate.
 Save
Save The year I finally understood pie was the year I stopped being afraid of it. I realized the recipe wasn't a test I could fail—it was an invitation to try something that people have been making for centuries, and if it wasn't perfect the first time, I'd make it better the next.
Crust Secrets That Actually Matter
The difference between a mediocre crust and a truly flaky one comes down to three things: cold ingredients, minimal mixing, and patience with chilling. I used to rush this part, convinced that more stirring meant better dough, but it's the opposite—the less you handle it, the better it becomes. One afternoon while visiting a baker friend, she showed me that the whole process from mixing to first bake takes about ninety minutes total, and maybe ten of those minutes are actual hands-on work. The rest is just waiting and letting things happen, which is oddly comforting when you think about it.
The Apple Filling Philosophy
Not all apples are created equal in a pie, and I learned this the hard way after using only sweet apples and ending up with a filling that tasted like apple candy. The mix of Granny Smith's tartness and Honeycrisp's natural sweetness creates a filling with actual dimension and complexity. The spices aren't there to mask the apples—they're there to highlight them, to add warmth without overwhelming the fruit. That lemon juice does more heavy lifting than you'd expect too; it brightens everything and keeps the filling from tasting flat and dull.
Timing, Temperature, and Why It All Matters
Temperature control makes or breaks this pie, and I've learned that the oven temperature, the dough temperature, and even the apple temperature all play a role. Your oven should be properly preheated so the crust sets before the butter has time to melt everywhere, creating those flaky layers instead of a dense bottom. The two-hour cooling period isn't just tradition—it's the time the filling needs to firm up so your slices stay neat instead of collapsing into a puddle.
- If your crust edges are browning too fast, don't panic—cover them with foil and keep baking; the filling still needs time to set.
- Some people skip the coarse sugar, but those granules stay crunchy even after baking and add a textural surprise that finishes the pie beautifully.
- Always cut your steam vents before baking, not after, or you'll end up with a soggy top and filling all over your oven.
 Save
Save This pie is the kind of dessert that reminds you why you started cooking in the first place. It's imperfect and honest, and that's exactly what makes it worth making again and again.
Recipe Questions & Answers
- → What types of apples work best?
A mix of Granny Smith and Honeycrisp apples is recommended for a balance of tartness and sweetness, ensuring a flavorful, tender filling.
- → How to make a flaky pie crust?
Keep the butter cold and incorporate it into the flour until coarse crumbs form. Add ice water gradually and handle dough minimally for flakiness.
- → Can the crust be made ahead of time?
Yes, the dough can be refrigerated for at least an hour before rolling out, which helps maintain its texture during baking.
- → What is the purpose of the egg wash?
Brushing the crust with beaten egg and milk creates a glossy, golden finish and helps coarse sugar stick for added texture.
- → How to prevent the crust edges from overbrowning?
If edges brown too quickly, covering them loosely with foil during baking will protect and prevent burning.
- → Can any extras be added to enhance flavor?
Adding a handful of raisins or a pinch of ground ginger to the filling brings additional warmth and complexity.