 Save
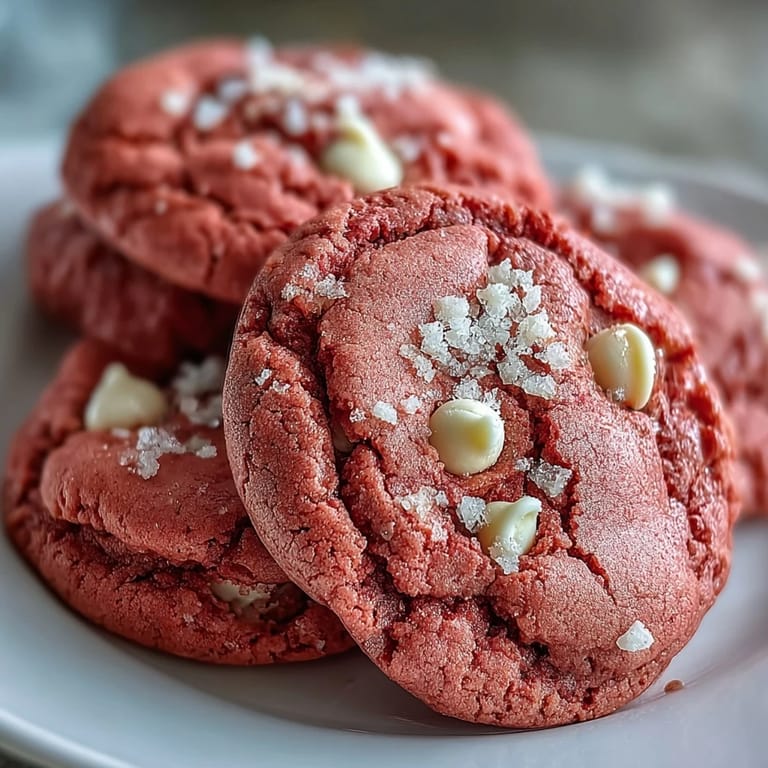
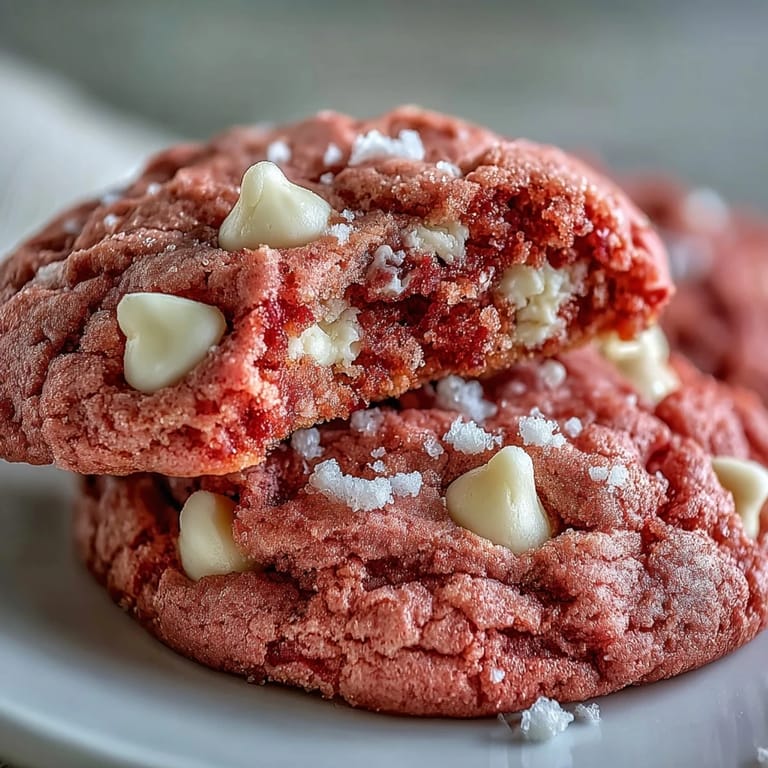
Save My daughter walked into the kitchen one Saturday and declared she wanted to bake something pink. Not strawberry, not raspberry—just pink. I laughed, pulled out my vanilla cookie base, and we ended up with these ridiculously cheerful rounds studded with white chocolate. They came out of the oven looking like something from a bakery window, soft in the center and sweet without being cloying. Now they show up every birthday, every girls' night, and every time someone needs a little color in their day.
I once made a double batch for a baby shower and watched grown women light up like kids when they saw the platter. Someone said they tasted like happiness looked, which is probably the best compliment a cookie can get. I've since learned that pink cookies have a way of turning any gathering into a celebration, even if it's just Tuesday.
Ingredients
- All-purpose flour: This forms the structure of the cookie, and measuring it correctly (spooned and leveled, not packed) keeps them tender instead of dense.
- Baking powder and baking soda: The combo gives you lift and spread, creating that perfect chewy-edged, soft-centered texture.
- Salt: Just half a teaspoon balances the sweetness and makes the vanilla and white chocolate sing.
- Unsalted butter, softened: Let it sit out until it gives slightly when pressed, this makes creaming with sugar infinitely easier and creates the fluffiest base.
- Granulated sugar: Creaming it with butter incorporates air, which is what makes these cookies light instead of flat.
- Egg: One large egg binds everything together and adds moisture without making the dough sticky.
- Vanilla extract: Use pure extract if you can, the flavor is noticeably warmer and more rounded.
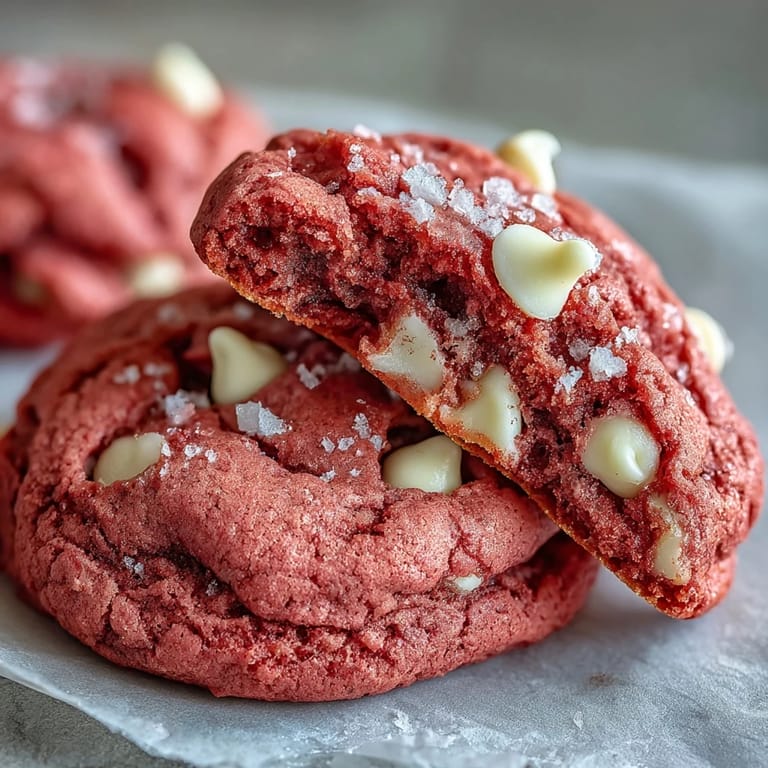
- Pink gel food coloring: Gel is key here because liquid coloring can throw off the dough's texture, start with a little and add more until you love the shade.
- White chocolate chips: They add creamy pockets of sweetness and look gorgeous against the pink, just make sure they're real white chocolate, not coating chips.
Tired of Takeout? 🥡
Get 10 meals you can make faster than delivery arrives. Seriously.
One email. No spam. Unsubscribe anytime.
Instructions
- Mix the Dry Ingredients:
- Whisk the flour, baking powder, baking soda, and salt together in a medium bowl until evenly combined. This step prevents clumps and ensures every cookie rises the same way.
- Cream the Butter and Sugar:
- Beat the softened butter and sugar together for 2 to 3 minutes until the mixture turns pale and fluffy, like whipped frosting. This is where the texture magic happens, so don't rush it.
- Add Egg, Vanilla, and Color:
- Beat in the egg and vanilla until smooth, then add the pink gel food coloring and mix until the color is even. The dough will look almost neon at first, but it softens as it bakes.
- Combine Wet and Dry:
- Add the dry ingredients to the wet mixture gradually, mixing on low speed just until no streaks of flour remain. Overmixing makes cookies tough, so stop as soon as it comes together.
- Fold in White Chocolate Chips:
- Use a spatula to gently fold in the white chocolate chips, distributing them evenly without overworking the dough. I like to save a few chips to press into the tops before baking.
- Chill the Dough:
- Cover the bowl with plastic wrap and refrigerate for 30 minutes. This step keeps the cookies from spreading into flat puddles and helps them hold their shape beautifully.
- Preheat and Prep:
- While the dough chills, preheat your oven to 350°F and line two baking sheets with parchment paper. Parchment prevents sticking and makes cleanup a breeze.
- Scoop and Space:
- Scoop tablespoon-sized balls of dough and place them about 2 inches apart on the prepared sheets. They'll spread just a little, so give them room to breathe.
- Bake Until Just Set:
- Bake for 10 to 12 minutes, until the edges are set but the centers still look soft and slightly underbaked. They'll firm up as they cool, and pulling them early keeps them chewy.
- Cool and Enjoy:
- Let the cookies cool on the baking sheets for 5 minutes, then transfer them to a wire rack. They're best when completely cool, but I won't judge if you sneak one while it's still warm.
 Save
Save These cookies have become my go-to whenever I need to show up with something that feels special without being fussy. I've brought them to potlucks, packed them in care packages, and left them on neighbors' porches just because. There's something about a pink cookie that says I thought of you, and that's a pretty sweet message to send.
Flavor Variations
If you want to play around, try adding half a teaspoon of almond extract for a subtle bakery vibe, or a few drops of rose water for something unexpectedly elegant. I've also stirred in freeze-dried strawberry powder for a natural pink color and a hint of fruit, which makes them taste like fancy wedding cookies. You can swap the white chocolate for dark chocolate chips if you want contrast, or even add a handful of chopped macadamia nuts for crunch.
Serving Suggestions
These cookies are perfect on their own with a glass of cold milk, but I've also sandwiched them with cream cheese frosting for special occasions. They look stunning on a dessert table next to vanilla cupcakes or arranged in a clear jar tied with ribbon. For a fun twist, crumble one over a scoop of vanilla ice cream, the soft cookie bits mixed with cold cream are ridiculously good.
Storage and Make-Ahead Tips
Store cooled cookies in an airtight container at room temperature for up to a week, though they rarely last that long in my house. You can freeze the baked cookies for up to three months, just thaw them at room temperature and they taste freshly baked. If you want to prep ahead, scoop the dough into balls, freeze them on a tray, then transfer to a freezer bag and bake straight from frozen, adding an extra minute or two to the baking time.
- Always let cookies cool completely before stacking them or they'll stick together.
- If your kitchen is warm, chill the dough a little longer to prevent spreading.
- Press a few extra white chocolate chips on top before baking for a bakery-style finish.
 Save
Save These pink velvet cookies have taught me that sometimes the simplest recipes bring the most joy. Bake them once, and I promise they'll become part of your regular rotation.
Recipe Questions & Answers
- → Why does the dough need chilling?
Chilling the dough for 30 minutes helps cookies maintain their shape during baking and prevents excessive spreading. This step also enhances flavor development and creates a chewier texture.
- → Can I use liquid food coloring instead of gel?
Gel food coloring works best as it provides vibrant color without adding excess liquid to the dough. Liquid coloring may alter the texture, but if necessary, reduce another liquid ingredient slightly.
- → How do I know when the cookies are done?
Bake until edges appear set and lightly golden while centers remain slightly soft. The cookies will continue firming as they cool on the baking sheet, so removing them while slightly underbaked ensures chewiness.
- → Can I freeze the dough?
Yes, scoop the dough into balls and freeze on a baking sheet until solid, then transfer to an airtight container. Bake from frozen, adding 1-2 minutes to the baking time, or thaw in the refrigerator overnight.
- → What creates the velvet texture?
Creaming butter and sugar until pale and fluffy incorporates air pockets for softness. The proper ratio of flour to fat, combined with careful mixing to avoid overworking the dough, creates the signature velvety chew.
- → Can I make these gluten-free?
Substitute the all-purpose flour with a 1:1 gluten-free flour blend designed for baking. The texture and taste remain nearly identical, making these accessible for gluten-free diets.