 Save
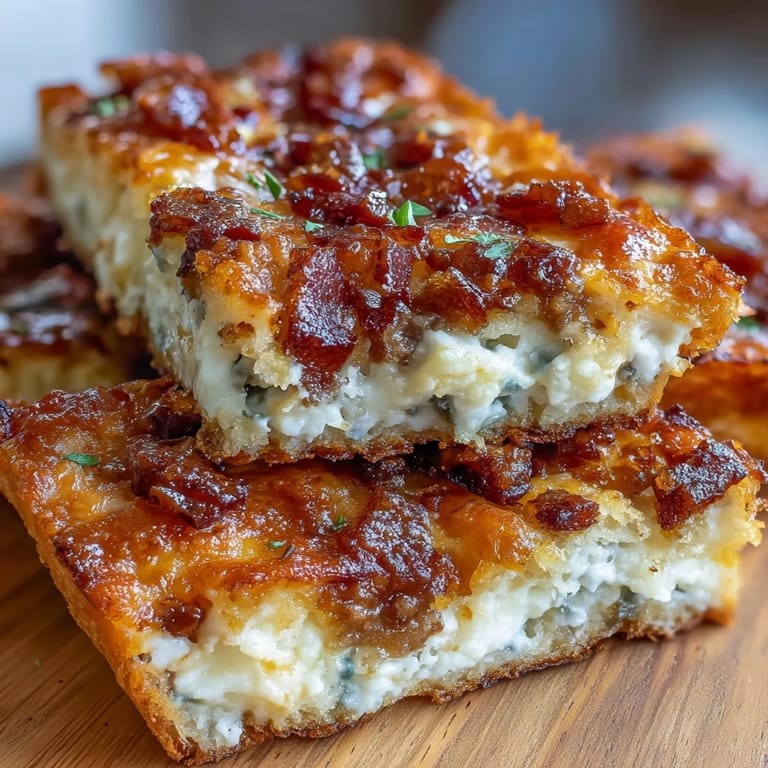
Save My neighbor showed up at my kitchen door one Derby Day afternoon with a basket of these cheese straws, still warm and impossibly crispy, and I watched them disappear faster than the horses crossed the finish line. She wouldn't share the recipe for weeks, insisting they were her secret weapon for every spring gathering, but eventually curiosity won out and she walked me through it right there at my counter. What struck me most was how she emphasized using cold butter and not overworking the dough, almost like she was passing down a treasured technique rather than just listing steps. Now I make them constantly, and I finally understand why she guarded that recipe so carefully.
I made these for the first time during a surprise family dinner on a rainy April evening, when my sister called saying she was bringing her new partner over in an hour. Instead of panicking, I remembered my neighbor's straws and threw them together while the table was being set, pulling them golden from the oven just as everyone arrived. The way his eyes lit up when he grabbed one was worth every bit of butter on my hands, and now they're his request whenever he visits.
Ingredients
- Sharp cheddar cheese, freshly grated (1 ½ cups): This is your foundation, so use real aged cheddar that actually tastes like something, not the pre-shredded stuff that's coated with cellulose and tastes like cardboard.
- Parmesan cheese, finely grated (½ cup): The Parmesan adds a salty, nutty complexity that makes people ask what's in these straws, so grate it fresh if you have time.
- Unsalted butter, cold and cubed (½ cup): Cold butter is non-negotiable here because it creates those delicate, crispy layers as it melts during baking, so keep it in the freezer until the last moment.
- All-purpose flour (1 ¼ cups): The flour just acts as a binder, so nothing fancy needed, but measure by weight if you can for consistency.
- Cayenne pepper (½ teaspoon): This brings a subtle warmth that sneaks up on you, so taste as you go and adjust if you prefer more or less heat.
- Fine sea salt (½ teaspoon) and freshly ground black pepper (¼ teaspoon): These season everything, so don't skip them or under-measure just because they seem small.
- Cold water (1–2 tablespoons, optional): This is your emergency button if the dough won't hold together, but add it sparingly and only when absolutely necessary.
Tired of Takeout? 🥡
Get 10 meals you can make faster than delivery arrives. Seriously.
One email. No spam. Unsubscribe anytime.
Instructions
- Start with a hot oven and clear workspace:
- Preheat your oven to 375°F and line a baking sheet with parchment paper so everything's ready when you need it. This simple prep step prevents rushing and burnt edges.
- Build your flavor base:
- Combine your cheeses, flour, cayenne, salt, and pepper in a food processor and pulse until everything is evenly distributed and you can't see distinct cheese pieces anymore. This is faster and more thorough than mixing by hand, and it keeps the butter from softening prematurely.
- Cut in the cold butter:
- Add your cubed cold butter to the processor and pulse in short bursts until the mixture looks like coarse breadcrumbs with some pea-sized pieces of butter still visible. You're aiming for texture here, not smoothness, because those butter pieces will create the flaky layers that make these straws so addictive.
- Bring the dough together:
- If the mixture seems too dry and won't hold together, add cold water one tablespoon at a time and pulse just until the dough clumps together. Stop the moment it comes together because overworking it will make your straws tough instead of tender.
- Roll and shape:
- Turn the dough out onto a lightly floured surface and gently roll it into a rectangle about ¼ inch thick, using a light touch like you're handling something precious. Cut into strips about ½ inch wide and 6 inches long, then transfer them to your prepared baking sheet with just a little space between each one.
- Bake until golden:
- Slide into the oven for 12 to 15 minutes until they're golden brown and smell absolutely irresistible, watching them toward the end so they don't catch too dark. You'll know they're done when they're crisp and when you touch the edge of one, it doesn't bend.
- Cool with patience:
- Let them rest on the baking sheet for 5 minutes so they firm up, then transfer to a wire rack to cool completely so they don't get soggy from trapped steam. This small step is what keeps them crispy for days.
 Save
Save There's something almost ceremonial about watching someone bite into a cheese straw you've made for the first time, that moment of their eyes widening when they hit that buttery, crispy texture and realize how much depth of flavor comes from something so simple. I've learned that these straws are more than just a snack, they're a conversation starter and a small gift you can give without much fuss.
The Derby Day Tradition
These straws became my answer to every spring entertaining question because they work for casual backyard gatherings, sit beautifully on a fancy platter, and somehow make any occasion feel a little more festive. The first year I made them for an actual Derby Day party, I realized they pair perfectly with mint juleps, Kentucky bourbon, and good company, which is probably why my neighbor protected that recipe so fiercely. They're the kind of appetizer that disappears quietly while everyone's distracted by the race, and then suddenly you're refilling the plate and wondering how you underestimated the batch size.
Variations and Flavor Adventures
Once you master the basic version, these straws become a canvas for whatever you're craving, and I've twisted them with smoked paprika, added a pinch of garlic powder, sprinkled herbs like fresh rosemary before baking, or even mixed in a tiny amount of spicy mustard powder for an unexpected kick. The structure stays the same, so you can experiment freely without worrying about ruining the recipe. I've found that less is usually more with additions, since the cheese is already the star and you don't want to muddy that flavor.
Storage and Make-Ahead Magic
One of my favorite discoveries is that you can make the dough a full day ahead, wrap it in plastic wrap, and keep it in the fridge until you're ready to roll and bake, which means minimal effort on party day. The baked straws stay crisp in an airtight container for up to four days, though honestly they rarely last that long in my house. If you're planning a gathering, you can even freeze unbaked dough portions and pull them out to bake fresh straws whenever hunger strikes.
- Keep them in an airtight container with parchment between layers so they don't stick together or get crushed.
- If they lose their crispness sitting out, a quick 5-minute warm-up in a 300°F oven brings them back to life instantly.
- Double or triple the batch if you're feeding a crowd, because people underestimate how many they'll eat and you'll run out before you expect to.
 Save
Save Making these cheese straws now feels like carrying forward a small kitchen tradition, a way of saying I care through something homemade and a little bit special. Every batch reminds me of my neighbor's kitchen and that first afternoon when her gift changed how I thought about entertaining.
Recipe Questions & Answers
- → What cheese types are used in these straws?
Sharp cheddar and finely grated Parmesan provide a rich, layered cheese flavor.
- → How is the cayenne pepper used?
A small amount of cayenne adds a subtle spicy kick balanced with the creamy cheese.
- → Can the straws be made ahead of time?
Yes, prepare and bake the straws in advance; store in an airtight container once cooled.
- → What is the best way to achieve a crispy texture?
Bake the strips until golden brown, ensuring even spacing on the baking sheet for crispiness.
- → Are there variations to the dough preparation?
Adding cold water helps bind the dough if too dry, and optional smoked paprika can be sprinkled on for extra flavor.